Monday, December 29, 2014

Christmas gift from GB

We saw this on the Sew Kind of Wonderful website. https://www.bloglovin.com/blog/post/4275983/3753915595 
She has given great directions in her tutorial.  I just warn you her directions are for an eight foot rack. It is huge!  

My husband decided to make it for me as a wonderful gift for Christmas.  And of course I had to get in there and put as many quilts as I had lying around up...even before it was anchored to the wall. 


2014 Review


My goals for 2014 were a bit ambitious for a beginner. 

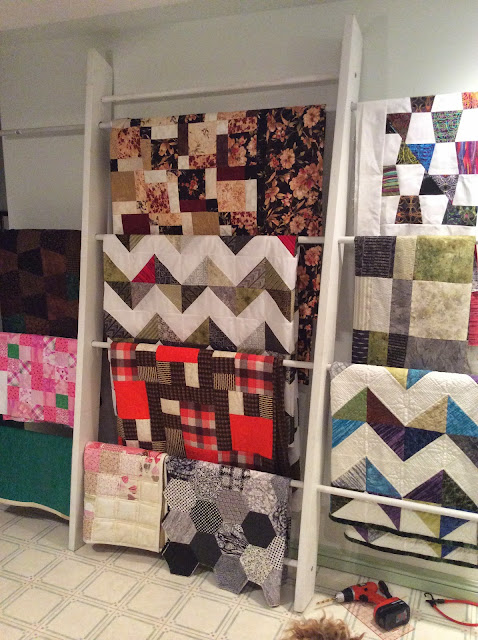
Stats: I have finished 17 quilts this year :  
      lap quilts                          5
      Child/baby quilts.             5
      bed quilts (dbl/Qin)           4
      small test doll quilts          2
      Wall hanging.                   1

As follows 
1. Goal:  10 quilts for kids. Although these are not specifically for kids they are quilts that were not specifically identified:
  
     Done - brown tumbler for Keith 
     Done - orange and brown for Alma  
     Done - Kathleen's double bed child's quilt - done
     Done - Disappearing 9 patch  
     Done - rag quilt for baby Gus
     Done - one for Charles' baby  
     Done - baby hexi  - done  
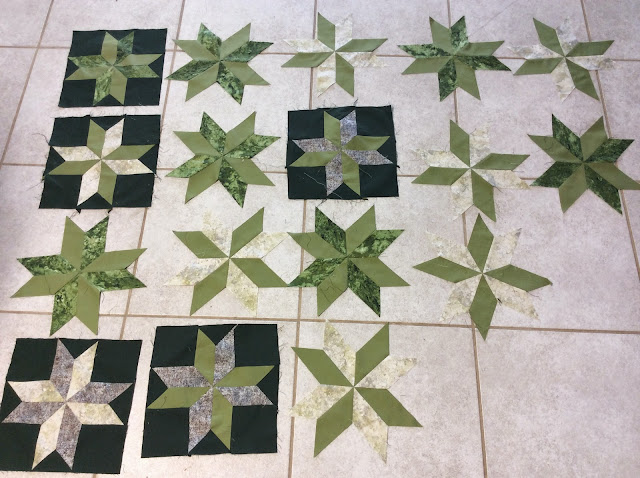
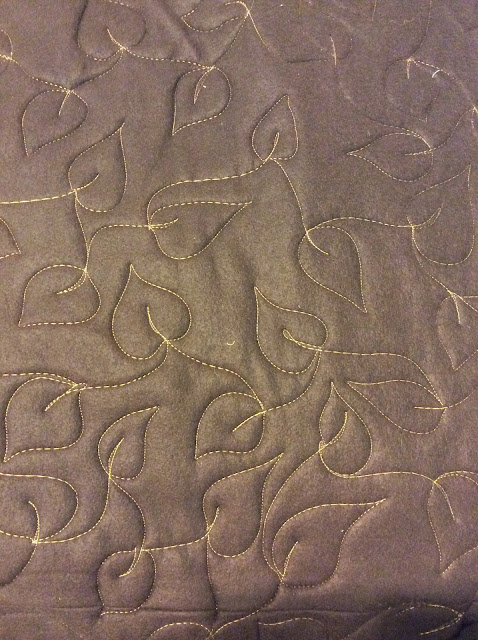
     Done - green test quilt 
     Done - green doll quilt
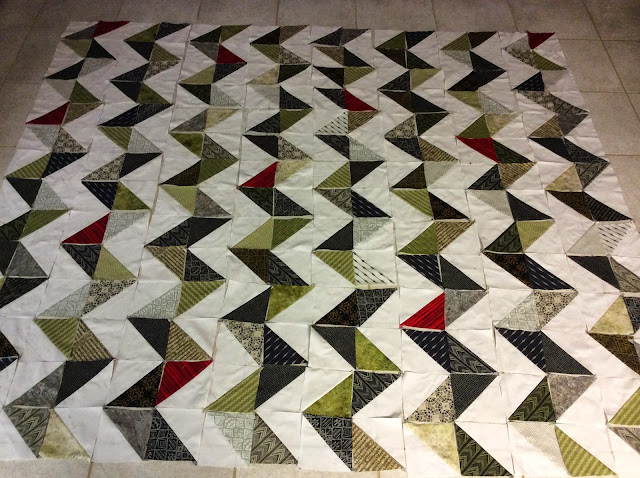
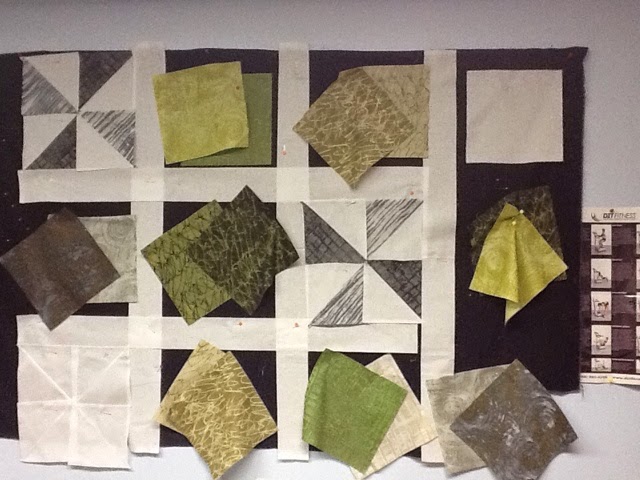
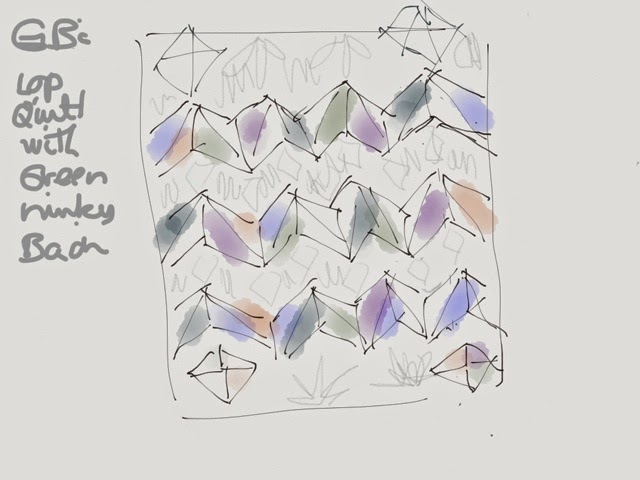
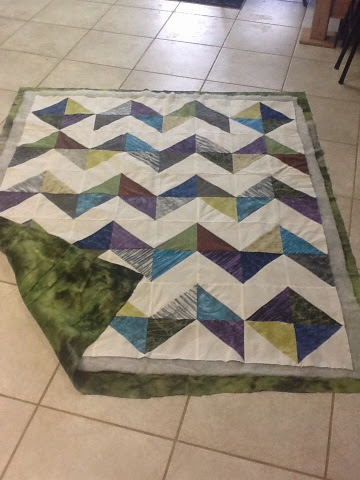
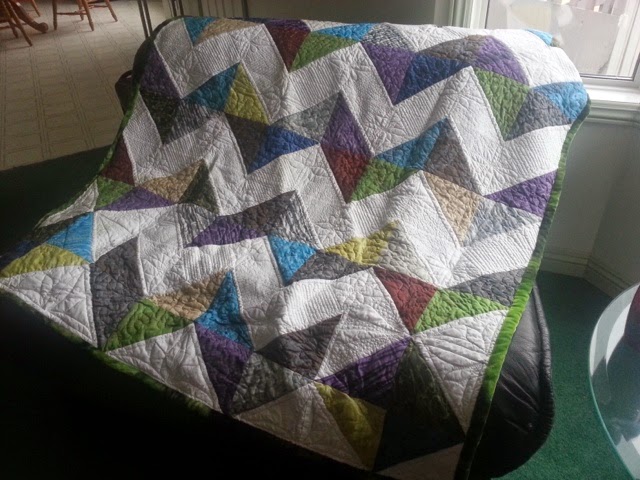
     Done - green chevron lap quilt and a 
     Done - wall hanging - red

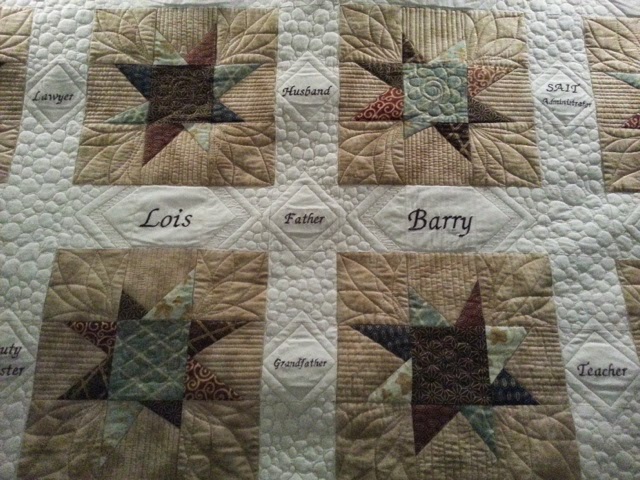
2.  Goal DONE my step dad's queen memory quilt. 
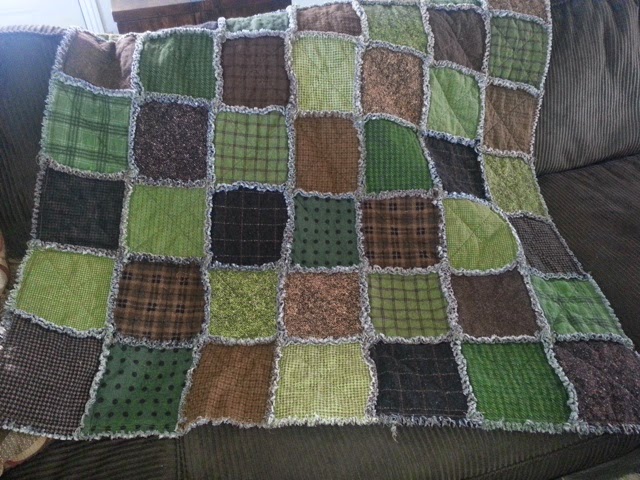
3.  Goal: DONE Make a lap rag quilt that I promised my son in law for his birthday. 
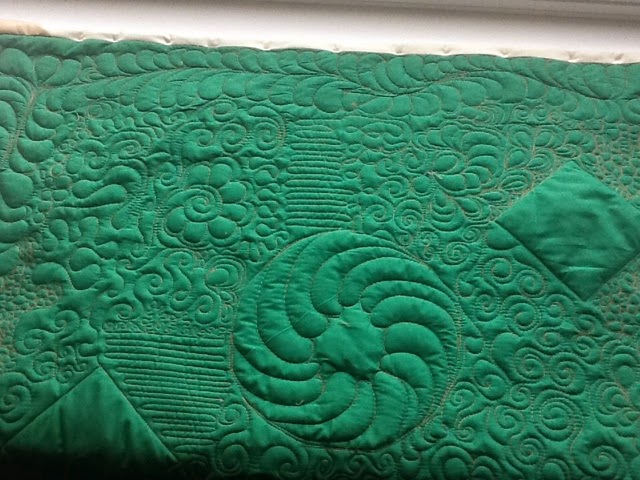
4.  Goal: DONE Make a queen quilt for my sister in law. 
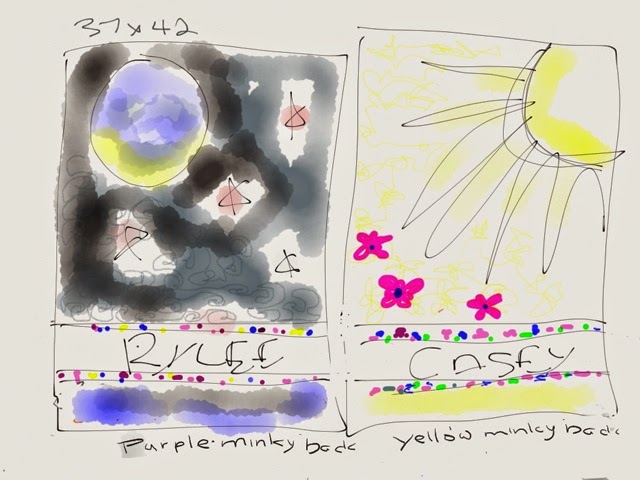
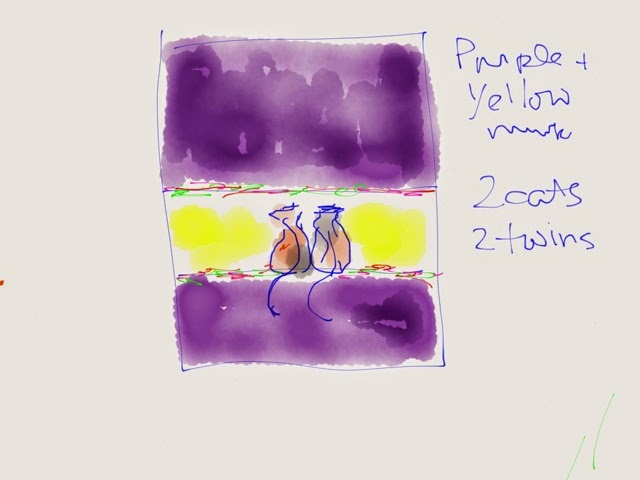
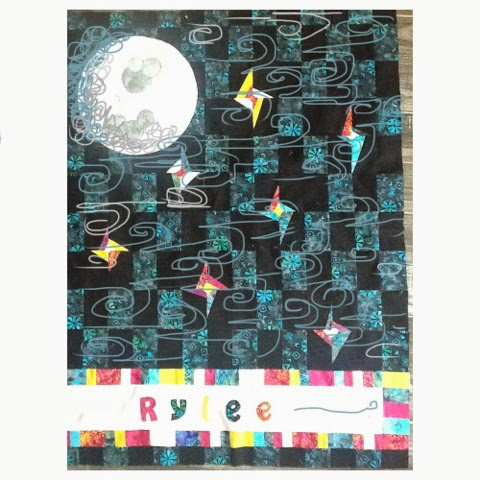
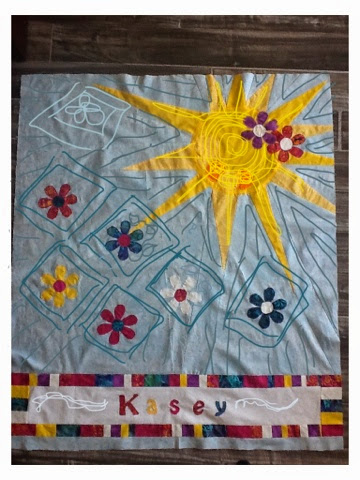
6.  Goal: DONE quilts for Kasey and Rylee, two little preemies born April 14 and just now able to go home.  
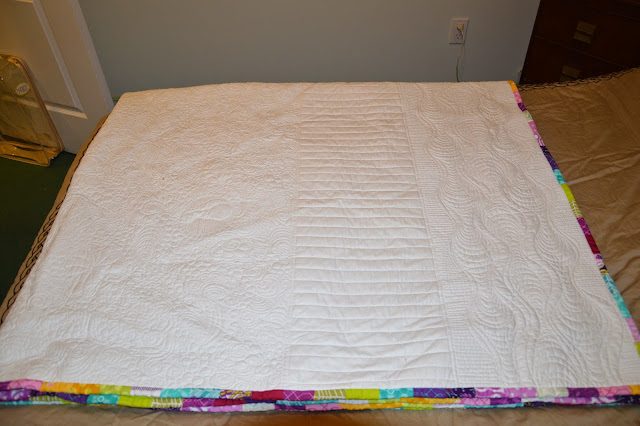
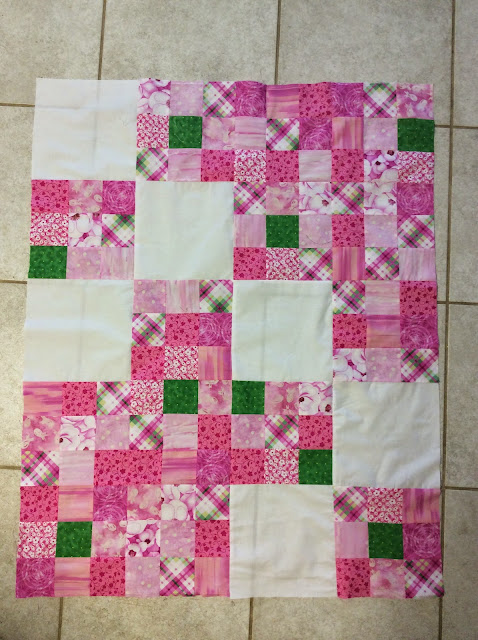
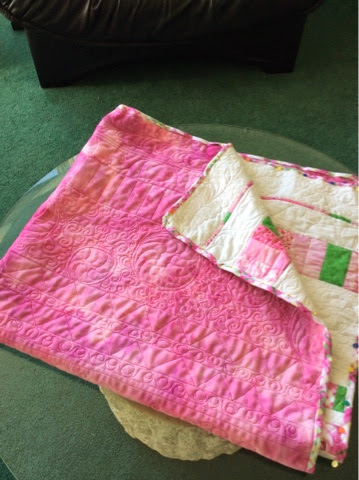
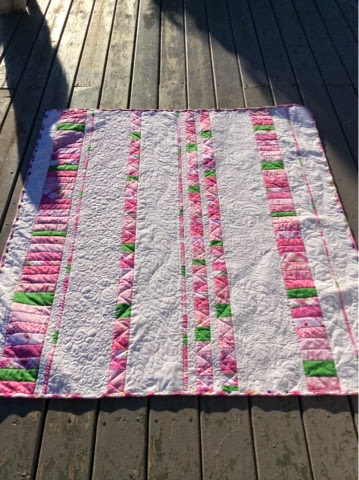
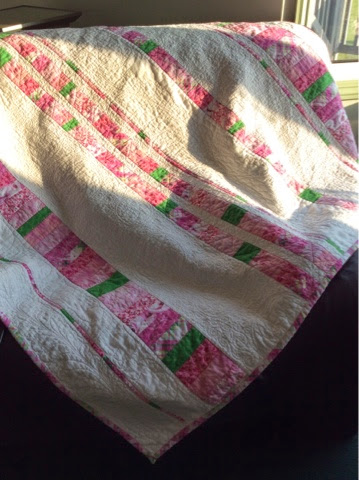
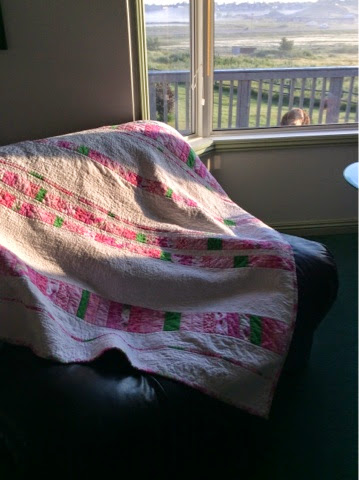
7.  Goal: DONE Make pink lap quilt for mom.  

Other goals: 
5.  Design a series of modern design quilt sketches representing work and emotions at work.  I have designed about ten quilts with my little quilt studio.  Made two so far. 
8.  Blog weekly- started blogging in mid/late June 2014. I have done 25 blogs so on an average that is a blog a week. 


My present to my granddaughter (9 yrs old)

Last Christmas I sent my granddaughter a sewing machine.  In August, for her birthday, I sent her a beautiful jelly roll of material and instructions for a strip quilt.  My promise to her was that when she came to grandmas' at Christmas I would teach her how to use the long arm and she could quilt her first quilt. 

I had an ulterior motive (or two). First I wanted to pass on a love of mine ... My first love being sewing in general and now quilting.  Second I wanted to give her mother an opportunity to do something with her and/or to have something in common and build a bond with her step-dad's mom who is a great quilter.  Third I wanted to have the opportunity to develop a special bond between us.  

She and her mom sewed the top together and she was extremely excited albeit a bit intimidated with the giant machine. Despite some problems at first with tension and the side holders she took control of the machine and whizzed her way through it.  


We were all so excited that we forgot to take any good pictures and I had to parse this little one out of a phone video. It's not well focused but it will be a nice reminder.

After she was done I bound it and she slept with it Christmas Eve. 

Merry Christmas Sam!

Sunday, December 28, 2014

Kathleen's quilt

I am so excited to finally be able to show you Kathleen's quilt.  Kathleen asked me to piece and quilt a fantasy quilt for her little daughter. She gave me some guidelines (her daughters initials within a circle on a plain band  and two bands of colour at the top) but basically left the quilting up to me. Because I have some material left I am making two pillow shams.

I incorporated a bunny, house, umbrella in the rain, and a kitten into a pattern of swirls, bubbles, flowers, leaves, and feathers.  The top border was swirls and the bottom border had a large pattern similar to one I saw on Angela Walter's blog.  

All the material is cotton. The batting is a cotton-poly and I used so-fine thread throughout. I backed it with a soft beige/brown Minky.  I bound it with the same material as in the stripes and I think it adds just the right extra pizzazz to the quilt. 


I love how the name band and bottom border turned out! 


Here is a picture of the centre panel.  


And another of how the panels look together.  


The back is beautiful too!  


I washed it and it looked wonderful but when transporting it it got creased.  I am hoping that with the next wash the wrinkles will hang out. 


Thank you Kathleen for allowing me to do this for you.  


Saturday, November 29, 2014

My son's mystery quilt is morphing

Well I have been talking and showing you a few WIP pictures of my son' Christmas quilt.... Well just as a good mystery takes the reader through a series of clues to tease and misguide you, I am not sure  I will be ablle to complete this story until I actually have something bound and under the tree!  The newest clues to the final outcome are...1) I am running out of time and 2) the improperly cut star material has worked out fine for the star itself but not for the background pieces...I see a trip to the LQS in my future...but in the meantime I don't have enough material to replace the background. 

But, I have enough of another material for a chevron... 

Mmmmmmm... 

So here is what I have come up with as it is laid out on my design floor. There was more than enough material and it's all cut correctly ( so much better than the earlier fiasco! ) I see at least one piece that is out of place but that will be fixed soon enough.  I've got my fingers crossed. 

So this weekend it's all about Kathleen's quilt which I won't show you just in case she is peeking :-)  and putting this chevron together.  Despite the small frustrations I am loving every minute of "my son's quilt from ...." struggle.  The star quilt will still get done and I already have a taker or two for it, so all is not lost. 

Stay tuned for more highlights in my journey to uncover my son's real quilt !  

Tuesday, November 11, 2014

My son's quilt from ......

I designed his quilt, bought the material, and then cut all 600 pieces.  Everything good you say? That's what I thought but then two things went wrong. First I didn't buy enough material of one colour and so after I started cutting I decided to make the quilt pattern smaller. I was going to just take out a row and a column because the original was quite large. Some how I switched the size of the block as well, changing how everything fit together. Second error, I started putting it together but soon realized that half of the pieces that required the most material (same colour) was supposed to be cut on the reverse side of the fabric (similar to stars). Ahhhhhhhhh. 

So I changed the quilt to a LeMoyne star and am using what material I can and adding to it. It will be a similar size and similar colours. So then, I have never done a Lemoyne star before....you see where this is going?  I cut parallelograms rather than breaking the shapes into squares and triangles and had a terrible time with the first five stars until I watched a Craftsy class and figured it out. So now I have nice neat and clean points (not all perfect but getting there) and they even lie flat!  

So lessons started but obviously not learned...did I tell you I was trying to use as much of the cut pieces from the original start?  

Well here's what I have so far. I need 30 stars of three colour combos.  


On the plus side I am getting better at bringing the points together and ending up with flat stars...now I have to see if I can piece in the dark green background from the original or if I have to change it to another colour...white?  But that doesn't suit his life style. So it might be off to the fabric store..a 200km drive.  Black?  Mmmmm...I have enough white, black, or burgundy brown. 


What do you think?

Monday, November 10, 2014

QUILTY weekend


Well I started out he weekend with two things on my list.  One was a quilt for my son and the other is a custom quilt for a friend of my daughter.  Although I don't want to post pictures of them yet they are going well.  But in between working on them I needed the odd break and so I cut and pieced together two little quilts...one is all stitched and ready for quilting, the other is still on my horizontal design wall... The floor :-)  I quite like the look of both of them.  The pink one has lots of room to add some quilting detail.


On the topic of my son's quilt... My son's quilt has been the quilt from......well, you know!  That's another post.....


Saturday, November 1, 2014

Saturday at home

My work is taking me away from home at least two days a week these days.  The one thing I hate is to come home after a 200km drive and then have to think about whats for supper.  So I thought I would get in front of things and prepare some freezer meals.  I made chili, Spanish chicken (omg so good!) ,


chicken soup, apple crisp with loads of cinnamon on top (can't you imagine whipped cream or vanilla ice cream melting in pools on the top),  


bumble berry pie,


 and corn and bacon quiche (a personal favourite), 


to go with the veggie soup already frozen.  So now we are set with about 11 single meals and 14 or more double meals. And dessert to boot!  


And between dishes I fooled around with some tumbler shapes, cutting them up and stitching them together in different ways (so much for the size of my baby quilt - not sure what it will turn into. ) but it has been fun. 


Sunday, October 12, 2014

Tumbler Lap Quilt


Although I don't usually like following other people's patterns I fell in love with a lap quilt kit I saw at the summer quilt show in Regina. Quilt Patch from Moose Jaw had a booth where they displayed several beautiful quilts and an assortment of their patterns. Among them were these beautiful little brown lap quilts with fuzzy backings.  They looked so warm and cuddly that I kept going back to the booth until I finally gave in and bought one. 

The kit called "Gezebella" came with an assortment of browns material and I added a bit of green to the mix and an extra two rows to make it a little bit larger. I quilted it freehand with a gorgeous gold thread in an overall leaf pattern.  I think it will make a great little Christmas present. 


Saturday, October 11, 2014

Playing with flannel

I decided to play with some flannel that I had in my stash (even though this project is not on my goal list).  I know that flannel doesn't tend to wear well but this stuff is so soft and beautiful that I really wanted to make something out of it. 

I bought all the flannel at the same online store so was surprised when some of it was quite a bit thinner than the rest (not a good omen for wear) and even when piecing it it was fraying a lot more than I expected. And, none of it was cheap!  It's a lesson learned!  

I designed this little quilt on a little app on my iPad called Quilt Studio. I played with the colours for quite a while before deciding on this arrangement. I was pleasantly surprised when all the measurements for material and sizes worked out. 

The finished square blocks are 12" and so the quilt is approximately 60x72 inches. I am going to back it with the herringbone brown and quilt it simply.  I think I am going to use wool batting to make it even softer.   I am very pleased with how it looks so far!  


As soon as I quilt it I will post more pictures. 

Monday, September 29, 2014

Trying out hexies

Well last week was one of those weeks where we did nothing but running: doctors and funerals and work trips. So to let down I took a day off work Monday and decided to do some playing in my sewing room. 

I have never done hexies that were not split in pieces (kaleidoscope) before and I don't have patience for a lot of hand sewing so I tried doing them on the sewing machine. I watched a couple great little videos on you-tube and off I went.  It went together very easily. The first row or so I struggled but modified the method to one that works great for me and the rest just fell in place. 

So here is my try at hexies. All cotton (I should have kept the name of the material) I think I will bind it in the red/orange. It measures approx 47x42.  

Saturday, September 13, 2014

Sister in law's quilt

My daughter gave me heck for not posting but I protested I have been busy. Three or so years ago I decided to make a quilt for my sister in law. 

I started by cutting out 500 pieces of material and then it sat there until I finished my step dad's quilt (professional pictures to come) in August just in time for his 83 birthday, and then I started in earnest. 

I didn't want to post anything until I gave her the quilt. I finished it last night.  She is coming today for a visit and it's going to be a surprise. She has no idea it is done or what it's going to look like...  But I think it's safe to show you.  

The quilt is a Sparkler quilt by Freshly Pieced.  I used some of Judi Madsen's ideas for quilting but just did a meandering on the sparklers. I could not believe my luck with the veregated thread I used in the coloured areas, almost a perfect match. I cannot remember whose collection the material is from (when I do I will add to the post). 

Sorry for the quality of pictures,  I just grabbed the old iPad to quickly document my progress.    

She wanted greens, purples, and blues.  I added white to give me the great quilting space.  


She also wanted frogs!  Frogs?  I said no but I did stick a couple (6) in the coloured pattern pieces -one per row.   See, this one is pink!


The thing she will certainly NOT be expecting is how I tried my hand at trapunto and included her name and her three kids on the corners. (Picture before clean up or binding) 


Enough for now..one more quck task to do - putting on my made by tag.


Thursday, July 31, 2014

Barry's quilt almost done

I am so pleased with how Barry's quilt is coming.  I only have the binding and some beadwork to complete.  Here is a sneak peak at just one part of the quilt.  

I love the colours and the quilting.  It's his 83 birthday on August 11 and I am going to take the quilt to him in person.  

I will post a large picture of the whole quilt this weekend. I sure have learned a lot with this quilt about my new machine's likes and dislikes. I am loving the process! 

Saturday, July 19, 2014

Fighting with my machine

Just a note.  I feel stupid and yet vindicated.  I have been struggling with my quilting on the Avante since I got it.  The installers set it all up but I could never get the tension on the fabric right.  I kept saying that something was wrong.  The machine appeared to be set up right according to the manual but while the front locking mechanism locked the back take up roller with the hand crank would not lock properly and so the quilt was always loose. I kept looking at how tight and beautiful others' quilts looked on their machines while mine sagged drearily. It finally got so bad with my dad's quilt that half way through stitching in the ditch I couldn't keep everything aligned (probably because it was so much larger than the test piece and mom's quilt that I have done since I bought the machine). 

I decided to go back over the manual and the video provided by Handi Quilter.  Part way through the video they showed how the leaders on the take up pole were attached and low and behold mine draped to the front rather than to the back. The installers had put the leader on backwards.  I don't know why I didn't twig on this earlier because my other set up is similar and those leaders hang the right way (I put that one together myself). 

I finished stitching in the ditch and took the quilt off the frame.  I noticed that the backing is slightly crooked, obviously operator error combined with the quilt's shifting on the poles. Luckily the quilt is one I am doing for family and I will be able to live with some of the imperfections... Adds character.  (Ahhhhh).

But my machine is now set up properly with the locking mechanisms giving just the right amount of tension!

Note to self.  If you think something is wrong...just because it was done by experts doesn't mean you are not right!  Trust your gut!

Wednesday, July 16, 2014

Mom's quilt finished


We'll another finish for 2014.  I decided to finish mom's quilt before I quilted and finished the preemies day quilt.  


I practiced feathers swirls and circles on the quilt.  I was so proud of myself doing two long columns of feathers, and they look pretty good ...until I took these pictures and burst out laughing - I realized I had quilted the feathers coming off the stem of the largest whimsical feather in opposite directions.  And, I forgot to fill in the surrounding area with a filler.  But my husband liked it. 

Circles were another issue as my machine or needle kept catching on something on the back of the quilt and throwing me off  rhythm. I guess more practice with different threads, materials, and batting will solve that!

Getting used to a new machine is fun. I finally am getting my stitch length closer to 10 per inch without using the stitch regulator. My eyelashes have disappeared.  Don't like how the regulator surges as I move the machine so I am determined to perfect my stitching without using the regulator. 


Here is the front and the back after pinning the binding.  I am pleased with my progress.  My binding is so much more professional than previous quilts.  Here is the back...


I love the Minky backing.  So soft!  


The quilt with an audience (Fuzzbucket my beautiful 28" standard poodle) peering in the window. 


Saturday, June 14, 2014

2014 Quilting Goals

I like the idea of setting goals for yourself. I apply it to other parts of my life and it has helped me focus on the tasks needed to achieve my goals.

I am hoping it will make a difference with my quilting as well.  After working for many years in large organizations and getting bogged down with small p politics and bureaucracy, I now find myself craving a creative outlet, one where I can develop my creative side and also leave a lasting caring legacy.  So here it is, my goal for 2014:

1. 30 quilts for kids.  I have decided to quilt 30 quilts for kids over the next three years (10 per year). This is a project that I want to complete for two reasons. The first is to give something of myself to others. The second, is to hone my quilting skills.  

2.  DONE Sandwich and Quilt (s&q) my step dad's memory quilt. Done

3.  DONE Make a rag quilt that I promised my son in law for his birthday. 

4.  DONE Make a quilt for my sister in law. 

5.  Design a series of modern design quilt sketches representing work and emotions at work.

6.  DONE S&Q quilts for Kasey and Rylee, two little preemies born April 14 and just now able to go home.  Rylee

7.  DONE Make lap quilt for mom.  Done

8.  DONE Set up this blog and 

9.  Blog weekly. 

Wow, that's quite ambitious.  Let's see how I do!  


Ben's Rag quilt

Remember that baby rag quilt and my promise to make my son-in-law a similar one for his birthday... Well his birthday was in March.  I finally finished it in June ( post note...I finally sent it to him in July!).  

I had trouble finding the colour flannel (green) that he wanted and so bought a whole bunch of green flannels and flannelette fabrics trying to find that right look.  It was not until I went to the local quilt show that I found just the right selection of greens and browns.  I cut the fabric into 8" squares and used a high loft poly batting. The top is made out of greens and browns while the backing is different shades of brown.  The quilt measures 44 x 52, a little smaller than I wanted but I ran out of material so it will have to do. I think it has a real masculine look to it. It's a bit stiff right now but I am hoping that with a few more washings and clippings it will turn out to be the rag quilt he wanted.  

Friday, June 13, 2014

Little green test piece done on the Avante

I decided to give the Avante a run for its money and see what I could do with no previous practice or training...except for looking at lots of examples on Pinterest and watching my favorite artists on the many Craftsy courses I have purchased (and recommend)!  Here is my first attempt.  Such fun!!!


Feathers and back tracking need lots of work but I am happy.  


Chevron

I have never made a chevron quilt before and am am amazed how beautiful they can be.  My process went like this: I was playing with 1/2 square triangles putting them in various configurations on my makeshift design wall.  ( not the greatest pictures )

I was amazed at all the possible looks and variations but settled on a chevron pattern as Chevrons are striking and allow for a diversity of quilting in the white spaces.  I use "paper" (by 53) or SketchbookPro for quick sketching and practicing my longarm quilting motions (similar but easier than an Etch A Sketch!) and I can store them easier than paper. 


I used a green Minky backing and Marcia Derse's Mosaic 10" squares (Windham) for the top (cotton fabric). 


I free motion quilted it on my non-stitch regulated Sweet16 that I am able to move to this great 6 foot ArtQuilter frame I bought from Martha (http://www.machinequilter.co.uk) in 2011. It's a great frame and it's portable.  Takes less than a half hour to set it up on any six foot table.  Great for art or baby quilts.  But, it's not big enough for stuff I want to do three years later.  Should have bought the bigger one!


In the white spaces the design is a loose flower motif at each point and straight lines in between.  On the chevron itself I chose to use a meandering stipple.  I was traveling way too fast for the speed of my needle and although the stitches are pretty regular I found a few eyelashes on the rounded corners.....lesson learned :-).  


  I think it turned out quite nice! 

Preemie quilts


My friend Jan's nephew and wife had twin girls April 14.  They were premature, born I believe at about 26" weeks.  They were so tiny!!! 

Jan asked if I ever made quilts for other people.....mmm...not really but I wanted to. I  decided to make the two quilts for the little girls.  Jan was good enough to let me design them myself. I mulled around some ideas and came up with this idea: Night and Day quilts - giving them each a different personality.  (Note- I just about got the names wrong!)


With twin cats on the back. 


Without any pattern or any real clue how to do impromptu quilts I just jumped in and started cutting material.  The two are similar and yet very different. Most of the material was from my stash.  


Now it's time to quilt them..  I have plans for the Night quilt with swirling wind  (the grey squiggles) and moon glow.  
 

I read somewhere that you should listen to your quilts to determine the quilting style and motifs.  Well, the Night quilt spoke loudly to me but the Day quilt mumbled... Still working on the design.    

 I will post pictures once they are done.

July 7:  While I think I have some tweaking to do on the night quilt it is starting to come together nicely. I have been machine quilting it in manual mode (not stitch regulated). Biggest learning: I have learned that I need to slow the motion of the machine head down or speed up the needle to get a better length of stitch.  Some of these are way too long.   Here are the pictures (photos are not the best) so far:


Back: